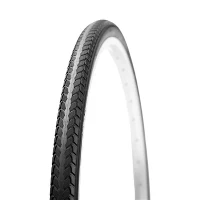
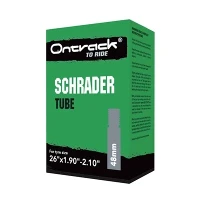
As a supplier of BMX bicycle tyres, I often get asked about the installation process. Installing BMX bicycle tyres might seem like a daunting task, especially for beginners, but with the right tools and a step - by - step approach, it can be a straightforward process. In this blog, I'll guide you through the entire process of installing BMX bicycle tyres.
Tools You'll Need
Before you start the installation, gather the following tools:
Tyre levers: These are essential for removing and installing the tyre from the rim. You'll typically need at least two tyre levers.
Pump: A good quality pump is required to inflate the tyre once it's installed.
Valve core remover: This tool is used to remove the valve core, which helps in faster inflation and deflation.
Soap and water: A mixture of soap and water can be used as a lubricant to ease the tyre installation process.
Step 1: Remove the Old Tyre
First, deflate the old tyre completely. Use the valve core remover to take out the valve core, allowing all the air to escape quickly. Once the tyre is deflated, place one tyre lever under the bead of the tyre at the valve stem. Hook the lever over the rim and pry the bead up and over the rim. Insert a second tyre lever a few inches away from the first one and repeat the process. Work your way around the rim, gradually prying the tyre bead off the rim until the tyre is completely removed.
Step 2: Inspect the Rim and Tube
With the old tyre removed, take a close look at the rim. Check for any sharp edges, dents, or debris that could damage the new tyre or tube. If you find any sharp edges, you can use a file to smooth them out. Also, examine the tube for any signs of wear or damage. If the tube is in good condition, you can reuse it; otherwise, it's best to replace it with a new one.
Step 3: Prepare the New Tyre
Before installing the new tyre, make sure it's the correct size for your BMX bike. You can find the size information on the sidewall of the old tyre or on the rim itself. Take the new tyre and apply a thin layer of the soap - water mixture around the inside of the tyre bead. This will act as a lubricant and make it easier to install the tyre on the rim.
Step 4: Install the Tube
Start by inserting the valve stem of the tube through the valve hole in the rim. Make sure the tube is laying flat inside the rim. Then, place one side of the tyre bead onto the rim, starting at the valve stem. Use your hands to work the bead onto the rim, pushing it down evenly around the circumference. Once one side of the tyre is mostly on the rim, leave a small section (about 4 - 6 inches) near the valve stem open.
Step 5: Insert the Rest of the Tube
Carefully insert the rest of the tube into the tyre, making sure it doesn't get pinched between the tyre and the rim. As you insert the tube, keep an eye on the valve stem to ensure it stays centered in the valve hole.
Step 6: Mount the Second Tyre Bead
Now, it's time to mount the second tyre bead onto the rim. Start at the valve stem and work your way around the rim, using the tyre levers if necessary. Be gentle when using the levers to avoid damaging the tyre or tube. As you get closer to the end, it might be a bit more difficult to fit the bead onto the rim. You can use your hands to push the bead down while using the levers to lift it over the rim.
Step 7: Inflate the Tyre
Once the tyre is fully installed, insert the valve core back into the valve stem. Use the pump to inflate the tyre to the recommended pressure. You can find the recommended pressure on the sidewall of the tyre. As you inflate the tyre, check to make sure the tyre is sitting evenly on the rim and that there are no bulges or uneven areas.
Step 8: Final Checks
After inflating the tyre, give it a final inspection. Spin the wheel to make sure it rotates smoothly and that the tyre is properly seated on the rim. Check the valve stem to ensure it's not loose or leaking.


Our BMX Bicycle Tyres
At our supply, we offer a wide range of high - quality BMX bicycle tyres. Two of our popular models are the BMX Bicycle Tires CHALLENGER and the BMX Bicycle Tires CONCOURS.
The BMX Bicycle Tires CHALLENGER is designed for high - performance riding. It features a durable tread pattern that provides excellent traction on various surfaces, whether you're riding on the streets, dirt tracks, or skate parks. The tyre is made from high - quality rubber compounds that ensure long - lasting wear and tear resistance.
The BMX Bicycle Tires CONCOURS, on the other hand, is more suitable for riders who are looking for a balance between performance and comfort. It has a slightly different tread pattern that offers good grip while also providing a smooth and comfortable ride. The tyre is also built to be lightweight, which can improve the overall handling of your BMX bike.
Contact Us for Purchasing
If you're interested in purchasing our BMX bicycle tyres or have any questions about the installation process, feel free to reach out to us. We're always happy to assist you and provide you with the best products and services. Our team of experts can help you choose the right tyre for your BMX bike based on your riding style and preferences.