Hey there, fellow cyclists! As a supplier of bicycle valves, I've heard my fair share of tales about tubeless bike valves that just won't hold air. It's a real pain in the butt, isn't it? You're all set to hit the road or the trails, and then you notice your tire's losing air faster than a popped balloon. But don't worry, I'm here to help you troubleshoot this pesky problem.
First things first, let's talk about what a Bicycle Tubeless Valve is and why it's so important. A tubeless valve is a key component in a tubeless tire system. It allows you to inflate the tire and keeps the air inside. When it fails to hold air, it can ruin your ride and leave you stranded.
Check for Visible Damage
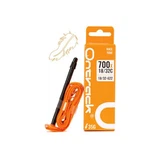
The first step in troubleshooting is to give your valve a good once-over. Look for any visible signs of damage, like cracks, cuts, or bent parts. Sometimes, a valve can get nicked during installation or when you're out on the road. If you see any damage, it's probably time to replace the valve. You can easily find a new Bicycle Tubeless Valve from a reliable supplier like us.
Inspect the Valve Core
The valve core is a small but crucial part of the valve. It's what controls the flow of air in and out of the tire. Over time, it can become loose or damaged, causing air to leak. To check the valve core, you'll need a valve core tool. Just insert the tool into the valve and turn it counterclockwise to remove the core. Take a close look at it. If it's dirty, you can clean it with a bit of soapy water and a soft brush. If it's damaged, you'll need to replace it. You can usually find replacement valve cores at your local bike shop or order them online.
Check the Seal
A proper seal between the valve and the rim is essential for keeping air in the tire. If the seal is broken, air will leak out. To check the seal, start by deflating the tire completely. Then, remove the valve from the rim. Look at the valve base and the area where it sits in the rim. There should be a rubber grommet or seal. Make sure it's in good condition and properly seated. If the seal is worn or damaged, replace it. You can also apply a small amount of tubeless sealant around the base of the valve when you reinstall it to help create a better seal.
Examine the Tubeless Sealant
Tubeless sealant is a liquid that helps seal small punctures and leaks in the tire. But if the sealant has dried up or become too thick, it won't work effectively. To check the sealant, inflate the tire to a low pressure and then spin the wheel. You should hear the sealant sloshing around inside. If you don't, it might be time to add more sealant. You can do this by removing the valve core and injecting the sealant into the tire using a syringe or a sealant injector. Make sure to follow the manufacturer's instructions for the correct amount of sealant to use.
Look for Leaks in the Tire
Sometimes, the problem isn't with the valve at all but with the tire itself. There could be a small puncture or tear that's allowing air to escape. To find leaks in the tire, inflate it to the recommended pressure and then submerge it in a bucket of water. Look for bubbles. If you see bubbles, mark the spot with a piece of tape. Once you've found the leak, you can patch it using a tubeless tire patch kit. If the damage is too severe, you might need to replace the tire.
Reinstall the Valve Correctly
After you've made any necessary repairs or replacements, it's time to reinstall the valve. Make sure the valve is clean and dry before you put it back in the rim. Insert the valve through the hole in the rim and tighten the nut on the inside of the rim. Don't over-tighten it, as this can damage the valve or the rim. Then, reinstall the valve core and inflate the tire to the recommended pressure.
Test the Tire
Once you've reinstalled the valve and inflated the tire, it's important to test it to make sure it's holding air. Leave the bike for a few hours and check the tire pressure. If it's dropped significantly, there's still a problem. Go through the troubleshooting steps again to find and fix the leak.
In conclusion, troubleshooting a tubeless bicycle valve that won't hold air can be a bit of a hassle, but it's definitely doable. By following these steps, you should be able to identify and fix the problem. And if you ever need help or if you're looking for high-quality Bicycle Tubeless Valves, don't hesitate to reach out to us. We're here to support you and make sure you have a smooth and worry-free ride.


If you're in the market for bicycle valves or have any questions about our products, we'd love to hear from you. Whether you're a bike shop owner looking to stock up on quality valves or an individual cyclist in need of a replacement, we can provide you with the best solutions. Just contact us, and we'll be happy to discuss your needs and help you find the right products for your bikes.
References
- "Bicycle Mechanics Manual" - A comprehensive guide to bike maintenance and repair.
- Manufacturer's instructions for tubeless tires and valves.