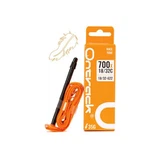
Ensuring a proper fit of a bicycle tyre liner is crucial for a smooth and safe cycling experience. As a reliable bicycle tyre liner supplier, we understand the significance of this process and are here to share some valuable insights on how to achieve it.
Understanding the Importance of a Proper Fit
A well - fitted bicycle tyre liner serves multiple purposes. Firstly, it acts as a barrier between the inner tube and the sharp edges of the wheel rim. This helps prevent punctures caused by the rim digging into the tube. Secondly, a proper fit ensures that the tyre liner stays in place during the ride, which is essential for maintaining the integrity of the tyre - tube system. If the liner is not properly fitted, it can shift, bunch up, or even cause the tube to pinch, leading to flats and potential safety hazards.
Selecting the Right Bicycle Tyre Liner
The first step in ensuring a proper fit is to select the right tyre liner for your bicycle. There are different types of tyre liners available in the market, and choosing the appropriate one depends on several factors.
Rim Type
The type of rim you have on your bicycle plays a significant role in liner selection. For traditional tubular rims, a standard Bicycle Tyre Liner is usually sufficient. However, if you have a tubeless rim, you will need a Bicycle Tubeless Rim Tape. Tubeless rim tapes are designed to seal the rim holes and create an airtight seal, which is essential for running tubeless tyres.
Tyre Size
The size of your bicycle tyre also matters. Make sure to choose a tyre liner that is compatible with your tyre size. A liner that is too small may not cover the entire rim, leaving the inner tube exposed to potential punctures. On the other hand, a liner that is too large can bunch up inside the tyre, causing uneven wear and increasing the risk of flats.
Preparing the Rim
Before installing the tyre liner, it is important to prepare the rim properly.
Cleaning the Rim
Start by thoroughly cleaning the rim. Remove any dirt, debris, or old tape residue from the rim surface. You can use a mild detergent and a clean cloth to wipe the rim clean. Make sure to dry the rim completely before proceeding. This step is crucial because any dirt or debris on the rim can prevent the tyre liner from adhering properly and may cause it to shift during the ride.
Inspecting the Rim
Inspect the rim for any damage or sharp edges. If you notice any cracks, dents, or rough spots, it is best to repair or replace the rim before installing the tyre liner. Sharp edges on the rim can easily puncture the inner tube, even with a tyre liner in place. You can use a file or sandpaper to smooth out any rough edges on the rim.
Installing the Bicycle Tyre Liner
Once the rim is prepared, you can start installing the tyre liner.
For Standard Tyre Liners
- Positioning the Liner: Place the tyre liner on the rim, starting at the valve hole. Make sure the liner is centered on the rim and that it covers the entire width of the rim bed.
- Securing the Liner: As you wrap the liner around the rim, use your fingers to press it firmly against the rim surface. Make sure there are no wrinkles or bubbles in the liner. If you encounter any difficulties, you can use a small amount of talcum powder to help the liner slide into place more easily.
- Overlapping the Ends: When you reach the end of the liner, overlap the ends by about 1 - 2 inches. This helps ensure a continuous barrier between the inner tube and the rim. Use a pair of scissors to trim any excess liner if necessary.
For Tubeless Rim Tapes
- Measuring and Cutting: Measure the circumference of the rim and cut the Bicycle Tubeless Rim Tape to the appropriate length. Make sure to leave a little extra length for overlapping.
- Applying the Tape: Start at the valve hole and apply the tape to the rim, pressing it firmly as you go. Use a roller or a credit card to smooth out the tape and remove any air bubbles. Make sure the tape covers all the rim holes completely.
- Sealing the Valve Hole: After applying the tape, install the valve stem through the valve hole. Use a valve core remover to remove the valve core temporarily. Apply a small amount of sealant around the valve stem and reinstall the valve core. This helps create an airtight seal at the valve hole.
Mounting the Tyre and Inner Tube
After installing the tyre liner, it's time to mount the tyre and inner tube.
Mounting the Tyre
- Lubricating the Tyre Beads: Apply a small amount of tyre lubricant or soapy water to the tyre beads. This helps the tyre slide onto the rim more easily and reduces the risk of pinching the inner tube.
- Installing the Tyre: Start by inserting one side of the tyre onto the rim, starting at the valve hole. Use your hands to work the tyre onto the rim, gradually working your way around the rim. Once one side of the tyre is on the rim, insert the inner tube into the tyre, making sure to align the valve stem with the valve hole on the rim.
- Mounting the Second Side: Carefully work the second side of the tyre onto the rim. This can be a bit more challenging, especially if you are using a tight - fitting tyre. You may need to use tyre levers to help you get the tyre onto the rim. However, be careful not to pinch the inner tube with the tyre levers.
Inflating the Tyre
Once the tyre is mounted, inflate the inner tube to the recommended pressure. Check the tyre pressure regularly to ensure that it remains within the recommended range. Over - inflating or under - inflating the tyre can affect the performance of the tyre liner and increase the risk of flats.


Final Checks
After mounting the tyre and inflating it, perform a final check to ensure that the tyre liner is properly fitted.
Visual Inspection
Look for any signs of the tyre liner shifting or bunching up inside the tyre. If you notice any issues, deflate the tyre and re - adjust the liner as necessary.
Spin Test
Spin the wheel to check for any unevenness or wobbling. If the wheel is not spinning smoothly, it could indicate a problem with the tyre liner installation. Check to make sure that the tyre is evenly seated on the rim and that the liner is not causing any interference.
Contact Us for Your Bicycle Tyre Liner Needs
Ensuring a proper fit of a bicycle tyre liner is a relatively straightforward process if you follow the steps outlined above. As a leading bicycle tyre liner supplier, we offer a wide range of high - quality Bicycle Tyre Liners, Bicycle Tubeless Rim Tapes, and Bicycle Wheel Rim Tapes to meet your specific needs.
If you have any questions or need further assistance with selecting or installing a bicycle tyre liner, please do not hesitate to contact us. We are here to help you ensure a safe and enjoyable cycling experience.
References
- "Bicycle Maintenance Handbook" by Park Tool Company
- "The Bicycle Wheel" by Jobst Brandt