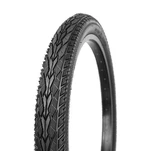
Changing a bicycle inner tube is a fundamental maintenance skill-whether you're fixing a flat tire or upgrading to a new tube. The process is similar for most bikes (road, mountain, hybrid) and requires only basic tools. Below is a step-by-step guide with pro tips to make the job quick and easy:
Tools You'll Need
1. Tire levers (2–3 plastic levers work best; avoid metal to prevent damaging the rim or tire)
2. New inner tube (match the size to your tire: e.g., 700x23c for road bikes, 26x2.10 for mountain bikes-check the sidewall of your tire for the size)
3. Bike pump (with a compatible valve head: Presta or Schrader-Presta valves are narrow with a small lock nut; Schrader valves are wide like car tires)
4. Optional: Rag (to clean the tire/rim), patch kit (for emergency repairs), tire sealant (to prevent future flats)
Step 1: Remove the Wheel from the Bike
1. For front wheels: Open the quick-release lever (or loosen the axle nuts) and lift the wheel out of the fork. If your bike has rim brakes, squeeze the brake caliper arms together to release the tire from the brake pads (or use the brake quick-release if equipped).
2. For rear wheels: Shift the chain to the smallest cog (to loosen tension), open the quick-release/axle nuts, and lift the wheel out. You may need to pull the derailleur back slightly to clear the chain.
3. Place the wheel on a flat surface (tire side up) for easy access.
Step 2: Deflate the Old Inner Tube
1. Schrader valve: Press the small pin in the center of the valve with a tire lever, pump head, or your finger until all air is released.
2. Presta valve: Unscrew the small lock nut at the top of the valve, then press the pin to deflate the tube completely.
3. Ensure the tube is fully flat-this makes it easier to remove from the tire.
Step 3: Separate the Tire from the Rim
1. Insert tire levers: Slide the tip of one tire lever under the tire bead (the edge of the tire that fits into the rim) about 6 inches from the valve stem. Push the lever down to pop the bead over the rim edge, then hook the lever onto a spoke to hold it in place.
2. Pop more of the bead: Insert a second tire lever 2–3 inches away from the first, and repeat the process. Slide the second lever around the rim to pop the entire side of the tire off the rim.
3. Leave one side of the tire on the rim: You only need to remove one side of the tire to access the inner tube-keeping the other side on makes reinstallation easier.
Step 4: Remove the Old Inner Tube
1. Locate the valve stem: Pull the valve stem out of the rim hole.
2. Pull the tube out: Gently pull the inner tube out from under the tire bead, starting at the valve stem and working your way around the rim.
3. Inspect for the cause of the flat (critical step!):
* Check the inner tube: Inflate it slightly and submerge it in water (or run a rag over it) to find air bubbles-this marks the hole. Note the location to help find the sharp object in the tire/rim.
* Check the tire: Run your fingers inside the tire (wear gloves to avoid cuts) to feel for thorns, glass, nails, or sharp edges. Remove any debris with pliers.
* Check the rim: Inspect the rim strip (the rubber/plastic strip that covers the rim holes) to ensure it's intact and not shifted. A damaged rim strip can cause flats by pinching the tube against the rim's metal edges.
Step 5: Install the New Inner Tube
1. Partially inflate the new tube: Inflate the tube just enough to give it shape (about 5–10 psi). This prevents it from getting twisted or pinched during installation.
2. Insert the valve stem: Push the valve stem of the new tube through the rim hole from the inside. Ensure the valve stem is straight and not bent.
3. Work the tube into the tire: Gently tuck the inner tube under the tire bead, starting at the valve stem and working your way around the rim. Make sure the tube is not twisted or pinched between the tire and rim.
Step 6: Reattach the Tire Bead to the Rim
1. Start at the valve stem: Push the tire bead back onto the rim, starting near the valve stem. Use your hands to press the bead over the rim edge-avoid using tire levers if possible, as they can pinch the new tube.
2. Finish the last section: If you can't push the final 6–8 inches of the bead with your hands, use a tire lever carefully:
* Insert the lever tip under the bead, but only push enough to pop the bead over the rim-do not lever against the tube.
* Use two levers if needed, moving them a little at a time to avoid pinching.
3. Check the valve stem: Ensure the valve stem is straight and fully extended through the rim hole. Tighten the Presta valve lock nut (if applicable) to hold it in place.
Step 7: Inflate the New Tube
1. Inflate slowly: Attach the pump head to the valve and inflate the tube in short bursts (10–15 psi at a time). Pause to check that the tire bead is seating evenly around the rim-if it bulges or pulls away, deflate slightly and adjust the bead.
2. Check tire pressure: Inflate the tire to the recommended pressure (found on the tire sidewall, e.g., 35–80 psi for hybrid bikes).
3. Inspect the tire: Spin the wheel to ensure the tire is centered on the rim and not rubbing against the frame or brakes.
Step 8: Reinstall the Wheel
1. For front wheels: Slide the wheel back into the fork, align the axle with the dropouts, and close the quick-release lever (or tighten the axle nuts). Reconnect the rim brakes.
2. For rear wheels: Align the wheel with the frame dropouts, thread the chain onto the smallest cog, and close the quick-release/axle nuts. Adjust the derailleur if needed to ensure smooth shifting.
3. Test the bike: Take a short test ride to ensure the tire is secure, the brakes work, and there are no unusual noises.
Pro Tips for Success
* Avoid pinching the tube: The most common mistake is pinching the new tube between the tire and rim during installation-this causes an immediate flat. Inflate the tube slightly first and work slowly.
* Check the rim strip: A damaged or missing rim strip is a top cause of recurring flats. Replace it if it's cracked or shifted.
* Use tire sealant: For extra protection against punctures, add a small amount of tubeless tire sealant to the inner tube before installation (works for both standard and tubeless-ready tires).
* Match tube size: Always use a tube that matches your tire size-an ill-fitting tube will stretch or bunch up, leading to flats or poor performance.
https://www.ontrackcn.com/